Since last year, the pages of the magazine have been discussing the rules for filling out and...


People knew about what soap was and how to make it 4,500 years ago. Cuneiform, Sumerian, and clay tablets were used to record this information. At that distant time, the Sumerians used soap for one purpose - they used it to clean sheep skins from lanolin - it was preparatory stage before painting.
The Celts and ancient Romans needed soap to treat skin diseases. They used goat fat and ash as ingredients.
Currently, many people are interested in making soap at home, which is not at all surprising, because this hobby is not only an interesting, but also a profitable process, and many videos and master classes have been filmed on how to make soap at home.
Making beautiful scented soap seems like a rather complicated process, but it's actually simple! The next master class will introduce you to the sequence of preparing real homemade soap.
First you need to provide yourself with the following ingredients:

Also, you need to stock up on the utensils necessary for a water bath, various kinds of molds (confectionery, children's, etc.), alcohol, warm milk, broth or water.

Now you can start making soap.

You can even make your own “orange” soap:
Every person has the opportunity to learn how to make from scratch a wide variety of soap options: different shapes, shades and composition. Soap can be made in the shape of animals, cakes, hearts, etc.

It would take a long time to list all the reasons for self-made soap Here are some of them:

The basis for such production can be used:
Before proceeding directly to the manufacturing process, you need to become familiar with the concept of aggressive alkali and learn about the basics chemical process saponification of fats.
So, let's start making loofah soap.

Before starting work, the following components must be placed at the workplace:
The aluminum can will serve as a mold, so you need to cut off the top of it and fold the uneven edges outward so that they do not damage the soap when removed.

We place the loofah inside the cylinder jar and begin to fill it with various “fillings”:
Note! Before pouring the next layer, it is necessary to wait at least 5-10 minutes, since an aluminum can (as it turned out) has a negative effect on the hardening process, therefore, the layers can mix with each other, which as a result will not look very presentable.
We take out the resulting candle and place it in a cardboard box. We proceed to melting the white base or adding titanium dioxide to the transparent one. We alternate layers of a wide variety of colors and aromas: red with sea buckthorn, green with mint, yellow with grapefruit, etc.
Now let's move on to the fun part: remove the box and cut the soap into the necessary pieces. Don’t be upset if the layers overlap each other a little (they didn’t have time to dry completely) - this gives the soap a vintage effect and original appearance.
Below are some interesting and simple recipes for making homemade soap:
Homemade soap making is becoming increasingly popular today. And this is understandable, because making soap with your own hands is an extremely interesting and profitable process that quickly becomes addictive and turns into a favorite hobby. After all, this is a soap that contains natural essential oils; it may also contain natural additives - honey, oats, dried flower petals, chocolate, seasonings and much more. Homemade soap self made It is also enriched with all kinds of base oils that have powerful rejuvenating and caring effects.
Each oil has a different effect: relaxes or invigorates, has antimicrobial and anti-inflammatory effects, and much more. As a scrub, you can use ingredients such as poppy seeds, coffee, clay (blue, white, pink, green), ground nuts, etc., the main thing is not to overfill the ingredients, as the soap can crumble a lot and lather poorly. Food or cosmetic dyes are used to add color, and the presence of chemicals in this soap is kept to a minimum.
Homemade soap comes in three types: from baby soap, from soap base and soap "from scratch". Beginners, as a rule, start with baby soap - this is the easiest and most accessible way to everyone. Soap base best material to create designer soap, you can make soap of different colors and shapes. The most complex and expensive technology is soap from scratch. Here we do not use a ready-made soap base, but cook it ourselves from alkali and oils or fats. Well, to make everything more clear, let’s look specifically at each type of soap:
The simplest type of soap making at home is soap making from baby soap. If you decide to make soap at home, but are afraid, so to speak, of ruining everything, then first you can try to take the first steps using baby soap. Why should you start with baby soap? Because there are no chemical additives in it. This soap is intended for delicate children's skin, because such skin is susceptible to perfumes and alkaline environments. Therefore, you can easily add your own ingredients (oils, decoctions, flowers), and you will get soap with the desired aroma, color and shape. Baby soap also contains moisturizing glycerin, lanolin, and vegetable oils, which have a beneficial effect on the skin without irritating it. When choosing baby soap, pay attention to the composition - there should be no chemical additives, flavors or perfumes.
To make soap at home from baby soap, you will need the following utensils and tools:
Fine grater (the finer, the faster the soap shavings will melt);
Durable water bath pan (iron and heat-resistant);
A glass or porcelain plate (heat-resistant) of smaller diameter than a saucepan;
Molds for pouring (soft disposable jars, silicone baking molds, children's sand molds);
A plate for melting solid butter;
A knife for cutting prepared soap and a spoon.
So: we grate our soap. If the recipe contains solid oils, melt them in a water bath first, then add soap shavings, herbal decoctions (milk, water) and wait. The melting process takes about 15-20 minutes. Don't forget to make sure the soap doesn't boil. And as soon as the chips melt, the mass becomes viscous and without lumps, you can safely add base oils (1 tablespoon per 100 grams). Then remove from the water bath and add essential oils, dyes and other necessary components. It is better to do this at the end of the procedure, since such substances are volatile. Stir the resulting mass and pour into molds. Wait until it hardens completely, remove from the molds and dry for a day.
For 100 grams of baby soap you can add approximately:
1 tablespoon of base oils;
100 grams of any liquid (milk, decoctions, etc.);
6-7 drops of essential oils;
4-5 drops of dye;
50 grams of other additives (honey, coffee, oatmeal, chocolate, sugar, etc.).
Making soap from soap base.
 Soap base- This ready-made soap, colorless, odorless, neutral in properties. As a rule, the soap base is already balanced in terms of pH and the content of fatty nutritious oils. The composition of a soap base of any type and from any manufacturer (Russia, England, China and others) consists of natural ingredients without the addition of chemicals, and also without or with a slight odor.
The main components of the soap base are special surfactants, or surfactants, which are combined with oils and glycerin. It is thanks to surfactants that soap is able to remove dirt so well, while glycerin softens the skin and makes it smooth, and oils, penetrating the epidermis, help restore the skin and improve its appearance. Surfactants help increase the shelf life of soap and improve skin cleansing. If you are afraid of the effects of “chemistry” on your skin, then you can always soften its effect with the help of fatty base oils and active additives. Thus, getting a useful product that will help not only cleanse the skin, but also moisturize, soften, enrich with vitamins and much more.
English base is considered one of the best, because the quality of the finished soap from this base is usually pleasing. This base melts and hardens quickly, and the resulting soap does not dry out the skin. The English base has virtually no odor, which means it is easy to aromatize and retains the scents of essential oils. It does not produce lush foam like Belgian and German bases, because it contains few surfactants. However, the cleaning properties of soap do not depend on the amount of foam.
There are several types of soap base: solid, creamy and liquid. In turn, the solid base is transparent (purified), white (with the addition of titanium dioxide) and organic (based on natural ingredients, has a slight yellowish tint).
 Transparent soap base- such a base, as a rule, contains a sufficient amount of glycerin, which makes it soft and moisturizing. Transparency provides depth and richness of color that is more difficult to achieve with other types of soap bases. Without a pronounced odor.
 White soap base- differs from transparent only in the content of one element - titanium dioxide. This is white food coloring E171. The white soap base is completely opaque and has shades ranging from milky white to beige. It is easy to make your own white base by simply adding titanium dioxide to a hot clear soap base and stirring thoroughly. To evenly distribute titanium dioxide in soap, it is better to first dissolve it in glycerin and only then add it to a transparent soap base.
 Organic soap base- this product is a cross between soap made from scratch and a glycerin base. It is considered the most natural, brewed from tropical oils, glycerin and a minimal amount of surfactants. But it has a peculiar smell and a yellowish color (since no bleaching or odor suppressing components are added to it). Not transparent. But at the same time it is perfect even for sensitive skin. Organic soap base is rightfully considered the safest, healthiest, and highest quality.
 Creamy base- resembles a soft grainy white cream, ideal for making soap for sensitive skin. Designed for creating various peelings, scrubs, as well as for decorating solid soap. Does not require additional “cooking”. Easy to use. To make a scrub, it is enough to add essential and base oils, as well as abrasive particles, to a soft soap base. The advantage of a soft soap base is that it interacts with oils much better than a hard soap base. Therefore, the content of oils that you add to your cosmetics will be higher in the final product.
 Liquid soap base- suitable for creating shampoos, shower gels, bath foams and more. Finished product. Easy to use. Does not require remelting. Liquid base concentrates have a neutral pH level and are therefore safe for the body. It accepts base oils well and is gentle on the skin. Easy to paint and creates a nice light foam. With the help of various decoctions, oils and other useful ingredients, you will always have healthy and natural cosmetics at home.
So, to make soap from the base you need:
soap base, dishes for a water bath (or microwave), scales, molds, measuring spoons, base oils, essential oils, fillers.
The first step is to cut the soap base into small pieces. Next, melt it in a water bath (or in the microwave). Secret good soap is that heating must be carried out only until the base melts. The base should never be allowed to heat up to more than 60-65ºC. Under no circumstances should you bring the soap to a boil; the soap will dry out.
While the base is melting, you can add a little milk or cream to make a creamy mass. Instead of milk, you can add a drop of water or a decoction of herbs, but water can cause the soap to separate. It is best to replace water and milk with sugar, this will allow the base to melt faster and better.
When the base is no longer exposed to heat, you need to add the remaining components: these can be perfumes, aromatic essential oils, glycerin, dyes or natural products such as vanilla or honey or other components of your choice.
Now you need to pour the soap into a mold and spray the surface of the soap with alcohol from a spray bottle, this will remove bubbles on the surface. We leave the soap in the molds until it hardens completely; you can put it in the refrigerator or a cool place. After about 2-3 days, the soap will be completely dry and ready for use.
You can add 100 grams to a store-bought soap base.:
3-7 drops of essential oils
no more than 1 teaspoon of base oils
about 20 ml of herbal decoction, milk, etc.
3-4 drops of flavoring
1-7 drops of liquid dye
up to 1/3 teaspoon of pigment or mother of pearl
up to 3 tsp cosmetic clay, honey, ground herbs and much more.
Making soap from scratch.
 The so-called “from scratch” soap is obtained by a chemical reaction between alkali and fatty acids (the process of saponification occurs). Fatty acids can be vegetable oils, butters, waxes and animal fats. Depending on the soap consistency you want to get, choose the type of alkali: for liquid - potassium hydroxide (KOH), solid - sodium hydroxide (NaOH), for creamy - a mixture of both.
 Since this type of soap making involves working with alkali, it is necessary Necessarily will take care of safety precautions, therefore - remove all food products from the table where you will work, cover the surface with oilcloth. In addition, you will need a mask, safety glasses, rubber gloves and vinegar. The latter will come in handy if alkali suddenly gets on the skin - in this case, you should immediately drop a drop of vinegar on the affected area.
Just like when making soap from a ready-made base, when making soap from scratch, you need to prepare all the equipment you need in advance so that you don’t have to be distracted from the process later. Let me make a reservation right away that all the utensils used will have to be donated for your exciting hobby, since it will no longer be suitable for food products. And one more nuance - the dishes and tools used must be made of wood, heat-resistant glass, enameled (without damage or chips), stainless steel, plastic that can withstand high temperatures or special silicone. Cookware made from other materials may react with the lye or simply melt, so be careful.
Necessary equipment when making soap from scratch:
Kitchen scales with an accuracy of up to 0.1 grams; if you plan to make soap with a volume of over 0.5 kg, then scales with an accuracy of 1 gram are suitable;
A container that meets our safety requirements - for mixing the components of the future soap;
A larger pan is for a water bath;
A large and preferably high heat-resistant container for making an alkaline solution, since the reaction of alkali with water occurs very violently, until the water boils;
A stick for stirring this solution (glass or porcelain);
A plastic strainer for straining the solution will not hurt, although you can also use simple gauze here;
Disposable utensils (such as a plastic cup) or a regular plastic container to weigh out the lye;
Thermometers for oil and alkaline solution;
Mixer or immersion blender (hand);
pH meter or indicator strips for measuring pH levels;
Spoon for mixing soap mass (preferably made of wood);
Soap molds; thick cloth or towels for wrapping the soap.
How to make soap from scratch - general sequence of actions:
We create a recipe for our future soap (we select the necessary oils and calculate the weight of the components using a special “soap calculator”);
We weigh our oils (including waxes and fats, if provided for in the recipe), and it is better to place solid and liquid oils in separate containers;
Weigh the required amount of water (or ice), which should be clean bottled;
Separately weigh the oils for superfat and the selected additives and fillers;
Solid oils and wax - set to melt in a water bath;
- “we arm ourselves” with our protective equipment - we put on a respirator, an apron, goggles and gloves;
We weigh the lye - carefully, trying not to spill it past the dishes;
Place the container for obtaining an alkaline solution with water (or ice) in the sink and turn it on cold water(for faster cooling of dishes when a chemical reaction begins);
Pour the lye into the container in small portions, stirring; if you use ice, it will immediately begin to melt;
After the alkali has completely dissolved, pour the solution into the oil mixture through a strainer so that there are no undissolved crystals in it that could cause a thermal burn to the skin and mix thoroughly.
At cold using this method, you will need an average of one hour of time, but the finished soap will need to “mature” for about another month after production, to complete the process of saponification of the oils and acquire the qualities we need.
At hot method - the soap has to be boiled for at least two to three hours. This method requires some preparation, but we can use the finished soap in about a day! I think you need to try both options and choose the most optimal method for yourself - how to make soap from scratch.
Useful additives in soap making.
 Nourishing oils.
To make the soap even more beneficial and soft for the skin, you can add nourishing oils to it. They are solid (batter) and liquid. The most common batters- cocoa butter, coconut, palm kernel, shea butter, mango.
Among liquid The most commonly used oils are olive, almond, walnut, grape seed, sea buckthorn, jojoba, etc. All vegetable oils contain a complex of vitamins and fatty acids that are beneficial for the skin, each has nutritional and protective properties and each is good in its own way, but choose Of these, you can only decide which one will be most beneficial for your skin individually.
The total amount of oil added should not exceed 3-5%. You should not overdo it, otherwise the soap may not foam well. Also, excess oil can appear on the surface of the finished soap and ruin its appearance. Coconut, palm and castor oils, among other beneficial properties, also improve foaming.
 Soap fillers
You can add a variety of fillers to soap, depending on what additional properties you want to give it. To make the soap more useful - moisturizing and caring for the skin, you can add honey, concentrated aloe vera gel, glycerin, liquid vitamins (for example, aevit or a complex of vitamins E, C and beta-carotene), plant extracts intended for cosmetics.
For additional cleansing, for example, oily or problematic skin, add cosmetic clay - blue, white, black, pink, as well as fine sea salt. These components also saturate the skin with valuable minerals.
You can make a scrub soap by adding ground oatmeal, bran, coffee, grated cocoa, sugar, salt, specially processed apricot or peach pits, crushed natural mother-of-pearl, etc. Due to the foam, such soap will be more gentle and delicate , rather than a regular scrub, to cleanse and exfoliate the skin. Dry herbs and flowers also act as a light peeling agent and also decorate the finished soap.
You can make soap more attractive and interesting with the help of coffee beans, citrus zest, whole dried flowers, oatmeal, coconut flakes and the like. Poppy seeds, which also play the role of a scrub, look very beautiful in colored transparent soap.
Please note that only dry plants and spices can be put into the soap base - fresh herbs, flowers, and zest will soon begin to deteriorate. And many dried flowers, for example, lavender, heather, rose petals, lose their color in soap and simply turn brown.
Sometimes larger inclusions are added to soap, for example loofah- natural washcloth of plant origin. The result is a two-in-one product - both soap and a washcloth - with which you can wash and do a light superficial body massage at the same time.
Sometimes jewelry and toys made of plastic or rubber are fused into soap.
 Essential oils.
Essential oils not only give soap a pleasant smell, but also have a healing effect on the skin and the body as a whole. For example, tea tree oil is an excellent antiseptic and helps in treating oily, acne-prone skin, chamomile is good for delicate baby and sensitive skin, lavender soothes and relieves stress, and cheerful citrus scents improve your mood. Essential oils are selected individually, depending on the needs of the skin, but first of all, you should like their smell. You need to be careful with essential oils, as due to their high concentration they can cause irritation and even an allergic reaction. Essential oils have natural aromas because they are extracted from various parts of plants.
 Flavors and fragrances.
To add aroma to soap, fragrances or food flavorings are used. Fragrance is a complex mixture of organic substances. A fragrance contains many substances with individual odors, and a mixture of these odors provides the fragrance with an individual aroma. The intensity of a soap's odor is determined by the concentration of fragrance in the soap. The perfume composition has a multifaceted aroma that changes over time and combines floral, fruity, woody, fresh and other notes.
Food flavorings are chemical compounds coordinated with each other that form the taste and aroma characteristic of a particular food product. Food flavoring is 30..50, and sometimes more than 100 individual components coordinated with each other. These components can be either natural or identical to natural, or artificial aromatic substances. The areas of application of flavorings are limited only by your imagination. When choosing a flavoring agent, you should not draw a conclusion based on the initial “sharp” or “weak” impression of the aroma - these are “top notes” that may not appear at all in the finished product. Good result allows the use of several aromatic additives in one product. This can be the combined use of different flavors to obtain a bouquet of aromas. There are special fragrances for cosmetics on sale. Of course, they are not natural, but they are quite safe for the skin and give the soap aromas that cannot be achieved using essential oils.
 In order for the process of making soap to be pleasant and positive, and the result to please you, you should pay attention to some common mistakes made by soap makers:
The very first thing: when starting soap making, you need to clearly know what you want to get as a result. Beginners should follow this rule. It’s better to sit down and write down how you are going to add the ingredients, the sequence of actions. Because when the process has begun, sometimes you have to act quickly;
The soap base should not be overheated and brought to a boil. When overheated, the factory soap base loses liquid, the transparent base becomes cloudy, and unnecessary bubbles or foam appear. When the liquid at the base evaporates, the pH level changes and our soap becomes worse in quality;
For melting, be sure to take dishes with handles;
To make baby soap easier to grate, warm it up a little;
If the soap does not lather, feels greasy to the touch, or has droplets of oil on it, then you have added too many base and essential oils;
Do not add too many abrasive components to the soap - the scrub will be too harsh. If you put too few of them, they will all settle at the bottom of the mold;
There is no need to add water to the soap base. Adding water is necessary when making soap from scratch or from baby soap. It won't do any good in a soap base.
 When adding various components to soap, you should consider the following:
Sugar, chocolate, honey melt soap well. To make it healthier, you can add honey to the base - but not too much. Chocolate per 100 grams of base - 1 cube. Gives an intense brown color and a slight odor. It takes a little longer to harden. Honey and sugar are very important when melting baby soap shavings.
Powdered vanilla and cinnamon do not give the expected scent in the soap. Vanilla gives the soap a yellowish tint over time. This also applies to soap from scratch.
Rose petals in handmade soap can take on a very unexpected green color- it is better to decorate with soap roses.
Hibiscus flowers (hibiscus) are also useless to add to the soap mass - they do not color at all, but themselves become gray.
Adding salt to soap also has its own characteristics. If you make soap from scratch, add salt at the light trace stage, when after mixing the lye and oils the mass thickens slightly. When added to a hot soap mass from baby soap, it separates it into water and soap flakes. Salt thickens the soap base very quickly. After hardening, the salt may form crystals on the surface of the soap. Salt soap is almost not colored by food coloring.
Crystalline menthol is diluted with alcohol, preferably alcohol. It also works well in soap base.
All dry additives to the soap base settle at the bottom of the mold. This applies to scrubbing agents and powder dyes.
Zelenka in soap does not give such a bright emerald color. She is fading.
A lot of coffee powder in soap or dry herbs will feel like a hard washcloth on the skin. And this is not always pleasant.
Coffee liquid does not give off a coffee smell.
There is no need to color the soap with potassium permanganate! In the best case, it will simply dry out, in the worst case, you may not notice, unmixed manganese crystals will end up in the soap and then on your skin. There may be a burn.
Organic additives (petals, seeds and fibers) must be placed dry. If you add poorly dried additives (fresh petals, herbs or orange slices), they will mold inside the soap.
When making soap with loofah, there is no need to soak it. A soap base combined with water and a porous loofah will produce a lot of foam and excess liquid in the soap.
The usual strong aroma of store-bought soap is achieved by fragrances, and not by natural essential oils. Essential oils do not smell much.
Do not use essential oils and fragrances, fragrances, and scents at the same time. There must be one thing.
When dry mint is added to soap, the soap will have an unpleasant odor.
Red wine, raspberry and beet juices turn the soap gray.
Dry dyes must first be dissolved in a base oil or liquid, otherwise they may remain grains.
Making soap at home is a very exciting and creative process. So choose which method you prefer and experiment.
Good luck and creative success))
Useful tips
Until about 1916, making soap at home was a common occurrence.
Using leftover animal fats, as well as various additives, families prepared their own detergents for cleaning clothes and for personal hygiene purposes.
During World War II, when animal fats were available in limited quantities, German scientists developed synthetic detergents, and as a result Soap as we know it today was born.
Homemade soap became less popular, and gradually its use faded away.
In recent years the process home soap making is reborn.

Homemade soap is easy on your wallet: you can make a lot of soap, and it will cost you less than buying the same amount in the store, you can also use old soap remnants to create new soap.
Homemade soap is good for your body: it does not contain the potentially harmful chemicals found in commercial soaps.
Unusual skin care productsHomemade soap is good for environment: it contains no synthetic materials that accumulate in sewer systems for years wastewater and ultimately threaten natural resources.

Before you begin making your own soap, it should be emphasized that this process can be dangerous. Although you quickly adapt to the process, you should only start creating when the safety procedure is fully understood.
A little general information about homemade soap

Soap is a combination of water and lye with the addition of various oils. Water and lye are quite difficult to combine correctly because they must be brought to similar temperatures.
When mixing lye and water, the resulting substance becomes very hot, so it must be allowed to cool before adding oils.
Oils must be heated very carefully. Each oil has its own saponification index, which tells you how much lye is needed to turn that oil into soap. Therefore, if you use coconut oil, do not replace it with olive oil.

Lye is very caustic, therefore, do not allow it to come into contact with your skin. It also produces hazardous fumes, so wear a respirator and safety glasses when using it.
You will also need a mold to pour the soap into. Take any one you like. You can take one large one, then a large piece of the resulting soap will need to be cut, use a metal string for this, since It is not safe to do this with a knife.

The hardest part about making soap is knowing when it's ready. This is judged by a state called "next". This is a condition when a drop of soap remains on the surface without spreading quickly.
Soap with triclosan is harmful to the heart!Try to set the speed of distribution of a drop of honey on the tabletop. The situation is similar with ready-made soap.
Here are the ingredients to make standard soap:

- 700 ml purified water
- 270 grams of lye(dilute it in a large measuring cup and stir with a wooden stick used for Chinese food)
- oils(mixed in a large container):
1) 1 liter of olive oil (use cheap olive oil, virgin is not suitable)
2) coconut oil (390 g or 500 ml)
3) grape seed oil (515 g or 500 ml)
Heat the lye mixture and oils separately until 40 degrees Celsius. Then, after heating, very slowly pour the lye into the oil mixture. Next, lower the blender into the same container and mix the contents in short bursts for three minutes.

Instead of a blender, you can use a whisk, then the work will progress slower and you will need to constantly scrape the mass from the walls of the pan with a spatula. If you are seriously interested in making homemade soap, then it makes sense to use a separate, simple blender for these purposes.
It also makes sense to purchase such a thing as a thermometer, a necessary device in the household, not only for making soap. But some homemade soap lovers say that they can determine the desired degree of heating even without a thermometer. To the touch.

Finally add 10 ml of cinnamon oil. The less you add, the better it will be. In theory, the soap hardens very quickly at this stage.
Pour the resulting mixture into the prepared pan. Wrap the mold in a warm blanket and leave for 24 hours. This will keep you warm and help the chemical reaction happen.
Skin care: from school to deep gray hairThe next day, cut it into manageable pieces, place it on wrapping paper and put it in a cool place. After two weeks, turn the soap over to the other side. After a month you can start using it.

However, if you are afraid to work with lye, or have trouble getting it, then don’t worry, There is another way to make your own soap. By making your own soap this way, you will find a use for your old remnants that have been lying idle in the bathroom for a long time.
This soap is called milled soap because it consists of processed remnants of regular soap.

What you need to make this soap:
- 3 pieces of regular white soap without smell
- stainless steel or glass container
Water or coconut milk
Small saucepan
Wooden spoon
Supplements (essential oils, herbs, colloidal oatmeal, lavender, etc.)
Plastic molds

1. Grate the soap in a stainless steel container. The result should be about 2 cups of grated soap.
2. Melt the soap. To do this, add half a glass of water or milk to the soap flakes (it will make the soap soft). The liquid should only dampen the soap a little, because if you overdo it, it will take longer to make.

Place the pan inside a larger pot of water to create a water bath. Over low heat, gently stir the resulting mixture with a wooden spoon so that the soap does not stick to the bottom of the container. Be careful not to create foam when stirring.
Do this until the soap melts. If you feel like it's starting to dry out, just add a little milk or water. The resulting mixture should be translucent and slightly rough.
Does antibacterial soap poison the water?!3. Add other ingredients. Remove the soap from the heat and add those ingredients that you want to see in your soap, remembering to mix the mixture thoroughly. There are a lot of soap recipes, choose the one you like or create your own. You can add a few drops of your favorite perfume.

4. Place soap into molds. You can use any plastic rectangular container or individual ramekins. In this case, you are limited only by your imagination.
5. Refrigerate the soap. After the soap has been in the molds for a few minutes, it should be placed in the freezer for 1 hour to make the soap easier to remove from the mold.
6. After this, the soap should lie down approximately three weeks in a well-ventilated area. Once completely hardened, your soap is ready to use!
Soap Making: Important Soap Making Tips

1. Be sure to make sure that everything you need is at hand before starting the procedure.
There's nothing worse than trying out a new thing and then realizing halfway through that something is missing.
In addition to the main components - the components of the recipe, to “set up a soap making station” you will need the following tools:
a) rubber gloves and safety glasses;

b) two large bowls, made of material that does not react with alkali (durable plastic, stainless steel, glass). Do not use cookware made of fragile plastic, aluminum, tin or wood;
c) various measuring spoons for mixing. You'll need at least one heat-resistant plastic or stainless steel spoon to stir the lye, and a wooden spoon, whisk, or rubber spatula to join the elements together;
Measuring spoons come in handy if you plan to add essential oils to your soap;
d) measuring cup for liquids;
e) two thermometers to measure the temperature of your liquids;
e) soap molds. It is best to use molds made of glass, plastic or stainless steel. Wooden and cardboard molds will also work as long as you line them with wax paper.

g) paper towels, to immediately wipe up any spills. Especially if you are working with lye, a paper towel should always be on hand.
The list will vary depending on the type you are making and the ingredients you are adding.
Shampoos and soaps... lead to obesity2. Measure exact amounts of all ingredients
Whether you're making soap completely from scratch or making it from leftovers, follow the instructions strictly. recipe .
In some cases, inaccuracies in measurements can result in ending up with a smelly, unattractive batch of soap.
Three guarantees against failure:

Accurate scales capable of measuring the smallest weights;
An alkaline calculator available online, for example, this ;
Two accurate thermometers (to measure the temperature of the lye/water and oils, which should be the same).
Different oils require different amounts of alkali for saponification, so before you start, make sure you know soap index selected oils.
3. Learn more about the dangers of lye, or don't use it at all.

One of the main ingredients of soap, as we already know, is a very caustic substance - sodium hydroxide or alkali.
People have made soap at home for centuries without incident, but it is still a dangerous substance, and handling it requires a lot of attention and concentration.
Lye in any form can strip paint, eat through textiles, or, worse, burn your skin or eyes.

To protect yourself from all hazards, be sure to wear long sleeves, rubber gloves, and safety glasses when making soap. Residues of raw materials are also dangerous, so even when getting rid of them you need to be as careful as possible.
If alkali gets on your skin, immediately use vinegar. to neutralize its effect, and if alkali spills on any surface, then immediately wash it off with water and a cleaning agent.
7 Beauty Myths You Shouldn't Take SeriouslyEven alkali vapor can burn, so work in a well-ventilated area. For those looking for simpler and safer ways to make soap at home, there are the options discussed above.
4. Try it various methods soap making

The great thing about making soap at home is that you can control the entire process.
You also have several options at your disposal when it comes to exactly how you make your soap. You are not limited to the standard soap making process of adding lye/water to oils. This method is known as cold process.
Another method, no less popular, is hot process, in which lye/water and oils are heated to a certain temperature and only then mixed.
The hot soap making process will take you less time than the cold process.

Intimidated by the thought of using lye, or just want to turn the process into a game with the kids? Simply melt soap or unscented soap and add your desired ingredients. This was also discussed above.
If you want to take a more complex route and turn the process of making soap into real creativity, then try creating liquid or felt soap.
5. Experiment with different recipes or create your own

When it comes to making soap from scratch, you can use animal oils, such as beef tallow, or vegetable/canola oil, or Instead of water, use milk, tea or even beer.
In addition to the main ingredients, add all possible additives, these can be essential oils, spices, various herbs, and even decorative elements, such as rose petals and much more.
The best thing to do is find a basic recipe that you like and experiment with it.

Be sure to test additives before using them because some may not behave as you would like in your soap. For example, essential oils must be mixed with olive oil, which neutralizes the effect of their irritating components.
Once you get the hang of this, you will definitely face the fact that one day you will end up with something completely different from what you wanted. Don't throw away what you receive, recycle it, grate it and create something else, or cut it into small pieces and add bright spots to your new masterpieces.
The secret of how to make handmade soap is not known to everyone. Otherwise selling business natural soap It wouldn’t bring such profit and people wouldn’t bring back a new fragrant bar of magical action from every business trip.


The advantages of handmade soap include not only the purity of the product, but also uniqueness and individuality. You can independently select and add to the bar those nutritional components that your specific skin type needs. If you give a gift to a teenager, you need to take into account the increased likelihood of acne. Men need to soothe their skin after shaving. And confident women should be given skin care, youth and freshness along with soap.
To make your own soap, you need to purchase the necessary components:


After preparing all the components, you need to start making soap.


First, the soap base is grated so that it melts faster in a microwave oven or in a water bath. Base oil is added at the rate of 3 teaspoons per 100 grams of base.
Milk, cream or water is added while the base melts to obtain a creamy mass. Excess water causes the soap to separate, so it is best to add sugar to help the base melt faster.


Anyone can make this soap themselves at home.


Advice!To prevent the finished soap from deforming while it is delivered to the recipient, it must be wrapped on top with cling film.


If you don’t know what original gift to give to a friend, mother, mother-in-law, or lover, always remember that a gift made with your own hands is most valued. Considering women’s love for flowers, these two points can easily be combined and get the perfect bouquet - made from handmade soap.


If desired, you can make a bouquet of any number of flowers. Considering that roses are considered universal, you need to learn how to make them first. Knowing the basics, you can easily make any other flower. To make soap roses you will need:
Gelatin is poured with cold water and left to swell for half an hour - 50 minutes. At this time, the baby soap is grated and, stirring constantly, melted in a microwave oven or in a water bath until smooth. At this stage, flavors and cosmetic oils are added.


Add already swollen gelatin to the mixture and pour the soap into various forms (hair spray caps, baking dishes, empty cases for watercolors or cosmetics are suitable). It is better if the containers are silicone, since it is impossible to get soap in its original form from glass or metal. Place the resulting masses in the refrigerator for 10-15 minutes until hardened.
The soap cylinders will be slightly damp and still warm. Use a paring knife to remove thin round layers of soap. These are already petals for the future rose. They can be of different shapes and sizes. That's the beauty of it. To create the core, you need to twist one soap petal slightly diagonally. The next few petals need to be wrapped around the core.


To make the rose look like it has blossomed, you need to turn the edges of the next petals slightly outward. Continue until you get a flower of the required size. If the cone turns out to be too long, you can cut it off with a knife.
The leaves for the bouquet are made from soap in the same way as flowers, but in a different color. The veins are drawn with a toothpick or needle.
A rose with a leaf can be made into a separate flower to make a bouquet. Or you can use it to decorate a bar of soap. It all depends on the desire of the master.
Advice! Soap flowers are a great gift because you can not only wash with them, but also put them in the bathroom for decoration. Thanks to gelatin, the humidity will make the roses smell fragrant and lift the mood of the owner.
Handmade soap with a pattern is one of the most original gifts, which seems very difficult to make at home. If you choose a drawing that is close in spirit to the person to whom the product will be given, or even his photo, you will give not just hand-made soap, but a work of art in which your soul has been invested.


First of all, you need to select a thematic picture and print it on special water-soluble paper. It will be better if you use colored laser printer, since it accurately conveys all the colors that are not distorted during further manipulations. Before starting work, the drawing must be thoroughly dried and sprayed with hairspray.
Soap base or baby soap must be melted in a microwave oven or in a water bath so that there are no air bubbles. Dyes and flavors are not added to this layer, as they reduce transparency, which is necessary for image clarity.
The resulting melted soap is poured into a pre-selected mold in a layer 2 mm thick and a picture is placed on top, pattern down. To avoid air cavities, you need to immediately decide on the location of the printout. Sprinkle it evenly with alcohol on top and pour a 1.5 mm layer of soap on top. This is done so that the white layer does not spoil the picture if it leaks under it. Alcohol treatment is necessary to eliminate bubbles on the surface.


The next layer is white. It shows the best picture. Therefore, a little soap according to the mold is melted so that there is enough and poured on top of the already solidified transparent layer treated with alcohol. After complete hardening, the next thick layer can be decorated in an original way using soap shavings, glitter, coffee beans, dried flowers or other decorative elements. If shavings are selected, they must first be frozen so that they do not melt when they are poured into the next hot layer.
Advice!You can add a different number of multi-colored layers, depending on your imagination, but the main thing is not to overdo it, as the layers may not stick together.


To reach the heart of a loved one or simply cheer up a friend, you can give an original handmade soap with an inscription that is relevant and meaningful to you or the person. Experts identify two main ways to decorate a product.
To implement the first method, you need to pour a small amount of pre-melted baby soap onto cling film and let it harden a little. On this basis, cut out the letters needed for the phrase with a sharp object, preferably a needle or toothpick. After complete hardening, the base easily comes off the film. The main thing to remember is that you need to write the letters in a mirror image, since the front of the soap will be at the bottom of the mold.
 Attach the stencil to the finished bar of soap, take a sharp object, such as a wooden skewer, and trace the letters
 The second method involves having a ballpoint pen and plain paper. It looks a little cheap if you don't write it carefully. You need to write the phrase in bold and fill it with a thin layer of soap base. After hardening, the inscription easily remains on the soap, and the paper is torn off with a sharp movement. After the manipulations have been carried out, the printed phrase is placed in a soap mold and poured a second time with the melted base. To ensure that the layers stick together, do not forget about treating with alcohol.
Advice! To make the gift touching and individual, it is better to choose a meaningful phrase for the person. This will indicate your attention and understanding.
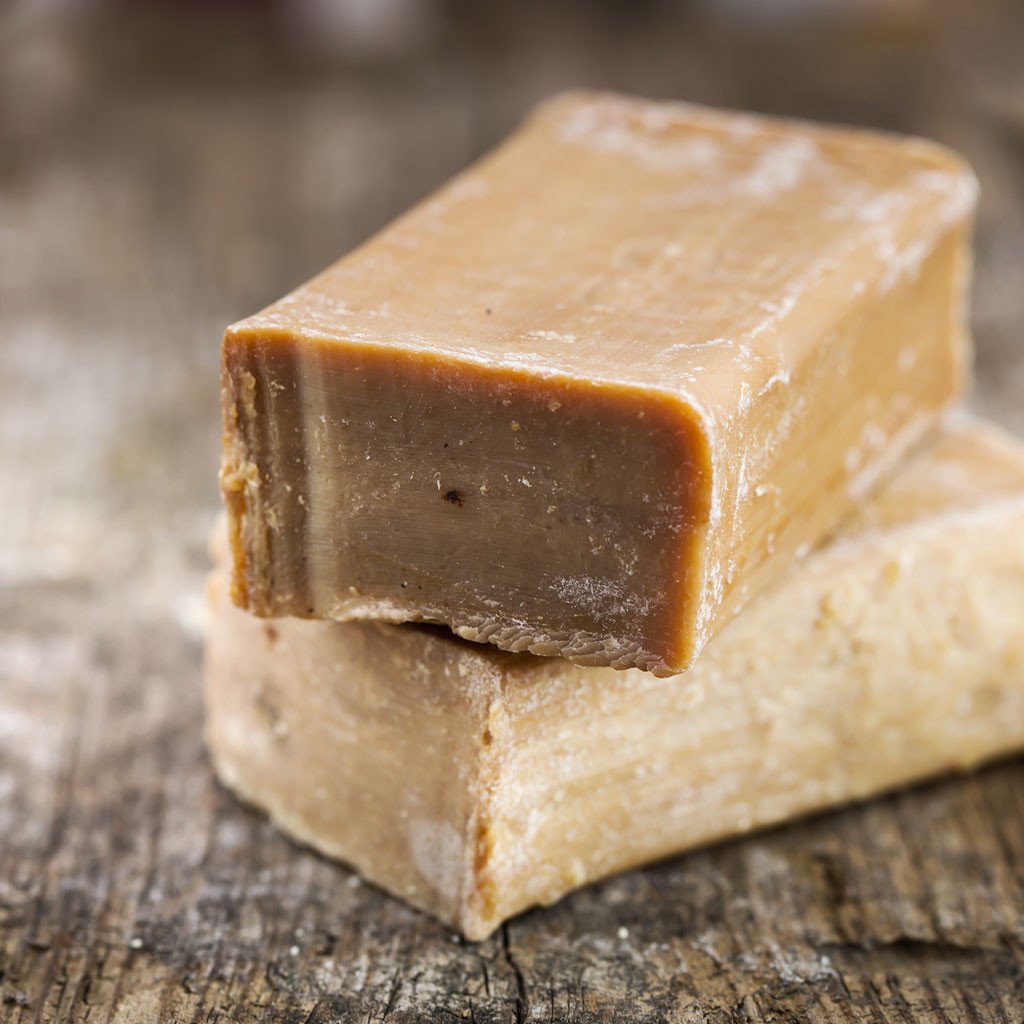
Laundry soap in the 21st century has lost its popularity due to its unattractive appearance, smell, and shape. However, everyone over 30 knows about beneficial properties brown substance:
There are three known methods of soap making based on laundry soap.
One of them is a three-layer kitchen one - it eliminates any contamination, including greasy stains and food residues on the plate. The basic rule of use is to wear gloves, as the product dries out the skin.
To prepare kitchen soap, you need to take 100 grams of laundry soap, grate it, add 180–200 ml of water and melt it in a microwave oven or in a water bath. When the resulting liquid resembles honey, beat it with a mixer at low speed. Collect the foam in a separate container. The mass, which has already been melted, is divided into three parts. To the first add a tablespoon of mustard powder, to the second - 2 tablespoons of coffee grounds, which will get rid of the unpleasant odor, and a spoon of castor oil.
To glue two pieces of soap, you need to sprinkle the first layer with alcohol and pour the second one on top of it. Alcohol also removes air bubbles.
The third layer with soda to enhance the cleansing effect. It is mixed with the foam that remains after the first whipping of laundry soap, and a tablespoon of soda. When laying this layer on top of the previous one, do not forget to moisten it with alcohol.
Soap in the shape of hearts - a cute gift for loved ones Handmade soap should be left to dry for at least a week. There will be no characteristic odor, the cleansing properties will increase several times.
The second method of making handmade soap will appeal to girls who take care of their skin condition, as this product nourishes and moisturizes it. You need to dissolve 150–200 grams of laundry soap and thoroughly mix with the ingredients one tablespoon each of honey, sunflower, sea buckthorn and castor oil, 100 ml of boiling water and one dessert spoon of apple cider vinegar. After obtaining a homogeneous mass, add 1 teaspoon of anti-cellulite oil, chlorophyllipt, vitamin E and 0.5 teaspoon of glycerin or baby cream.
For a pleasant smell, add 10 drops of lavender essential oil or men's eau de toilette to the soap. Once cooled, simply place in the freezer for just one hour. Then you can use it.
The third recipe contains milk, so the soap is excellent for delicate and sensitive skin.
80 ml of milk is mixed with 100 grams of laundry soap, previously grated, and the mixture is melted in a microwave oven or in a water bath, stirring occasionally. To speed up the process, add 1 tablespoon of honey. When the soap dissolves, beat it with a mixer until light and cool.
To the mass, which has already cooled, you need to add a tablespoon of apple cider vinegar, olive oil, castor oil and vodka. Almond essential oil helps to completely remove the aroma of laundry soap, but it is contraindicated for pregnant women and children under 6 years old, so it is better to use chocolate, cocoa, ginger, cinnamon and other aromatic additives.
Advice! To make the soap foam well, you need to add coconut oil or other vegetable fats to the composition.
This is one of the simplest and most enjoyable soap making methods. Even children can easily handle the base, not to mention adult beginner soap makers. To begin with, you can try transparent and white soap bases, without all kinds of additives and specializations.
You can find out more about soap bases (types, features, composition, manufacturers). As already mentioned, the most popular at the moment are the basics made in England; the Russian manufacturer also has a fairly large selection of basics.
The main thing is to remember and follow the rules for adding all components and dosage.
Advantages of the method:
The additives are the same as in soap prepared. I will duplicate the list of fillers. Remember that the base only takes a certain amount of ingredients, anything more will reduce the soapiness and lather.

This is the basic thing you need to know about the process of creating soap from a solid soap base. Everything else depends on your imagination, what you decide to put in the soap, what colors to paint it, what shape to choose.
Here are some examples of DIY soaps made from soap base.
Soap-scrub “Coconut Paradise”

Nourishes the skin, tones, softens. The soap will be clear rectangular with coconut flakes. Let's take the simplest and most inexpensive option. A rectangular mold (a plastic box of processed cheese, for example, will do.)
Recipe: transparent soap base (100 g), coconut oil (1.5 ml, half a teaspoon), mint essential oil (4 drops), if you have a coconut-scented fragrance, add 5 drops instead of essential oil, coconut flakes ( 2 teaspoons). If desired, you can add dye, if available.
Preparation:
Whipped soap "Chocolate"

Has a delicious chocolate smell. Nourishes the skin, gently cares. We take the same rectangular shape, if desired, you can choose any other. We don't need dye, thanks to cocoa the soap will be a rich brown color. Flavoring is also optional. You will only need a mixer to beat the soap, you can do this with a blender, the main thing is to wash it thoroughly afterwards.
Recipe: soap base (100 g), cocoa powder (2 tsp), coconut oil (1.5 ml half teaspoon), milk chocolate cube, milk (1 tsp), cinnamon essential oil 1 a drop.
Preparation:
Now you know how to make soap with your own hands from a soap base. Happy soap making!
Since last year, the pages of the magazine have been discussing the rules for filling out and...

The sales department is one of the main departments of the company because it...
